此篇為商業合作文章
前言
Bright Data 跟我之前介紹過的 DataForSEO
、
Aves API 一樣,都有提供抓取搜尋引擎結果的服務,因此照理說穩定度應該會比較好,不過 Bright Data 是專注於商務客戶,所以要提醒目前個人是無法使用的 (不支持個人用途,如打遊戲之類的)。
Bright Data 的 SERP API 目前支援 Google、Bing、DuckDuckGo、Yandex、Yahoo、百度 和 Naver 搜尋引擎,你可以用來做關鍵字追蹤、比較價格、市場研究、偵測版權侵權、廣告情報等等用途。
底下我會以最多人使用的「Google 搜尋 API」來當範例,一起從註冊、設定、測試到最後程式碼帶大家認識。
Bright Data 官網 註冊 Bright Data
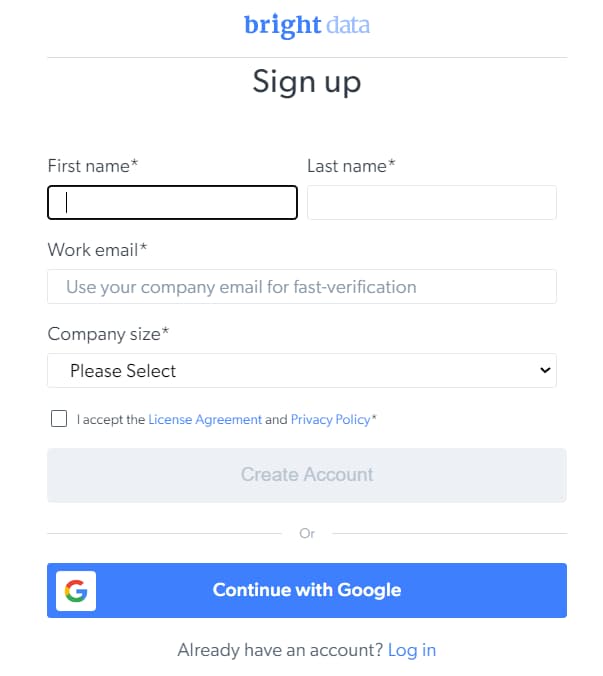
首先,需要有一組 Bright Data 帳號。
需要填寫姓名、工作用 Email、公司規模,就像文章一開始說的,它是面向商務的服務。
註冊 Bright Data 註冊後,在添加付款方式時,將收到 5 美元的額度可以讓你試用。或者可以聯絡你的客戶經理,會贈送一些額度可以讓你 免費試用
。
SERP API
SERP API 目前支援以下幾種搜尋,可以看出來涵蓋蠻多的:
Google Search Google Images Google Videos Google Maps Google Trends Google Reviews Google News Google Jobs Google Shopping Google Hotels Bing Search DuckDuckGo Search Yandex Search Yahoo Search 百度 Search Naver Search SERP API 價格
SERP API 價格官方有詳細說明在 這個網頁
,
依照方案分為四種:PAY AS YOU GO、GROWTH、BUSINESS、ENTERPRISE。
CPM 指的是每一千次請求 API 的價格。
GROWTH 和 BUSINESS 方案會有每月最低消費金額 (分別為 500 和 1000 美金),但它們使用 API 的價格就會再便宜一些些。
* 以上價格為美金💵
SERP API 價格 建立新的 SERP API Zone
第一次使用可以先參考 這篇官方文章 去設定,或直接跟著我底下的教學來實作。
進到 "
My Proxies
" 頁面,找到 「SERP API」點 "Get started" 來新增一個 Solution。
My Proxies > SERP API > Get started 接下來,設定一個 Solution 名稱 (在 Bright Data 內也等同 zone 名稱),注意這個設定後就無法更改 (就只能把它刪除,再建一個新的),其餘設定都可以之後再更改。
設定一個 Solution SERP API Zone 上方可以看到有三個頁籤,可以自己隨意點點看看:
Access parameters (存取參數) Configuration (配置) Statistics (統計數據) * 有幾個資訊後續 call API 時會用到,我也在這邊先標出來:"host"、"account id"、"password"、"zone"。
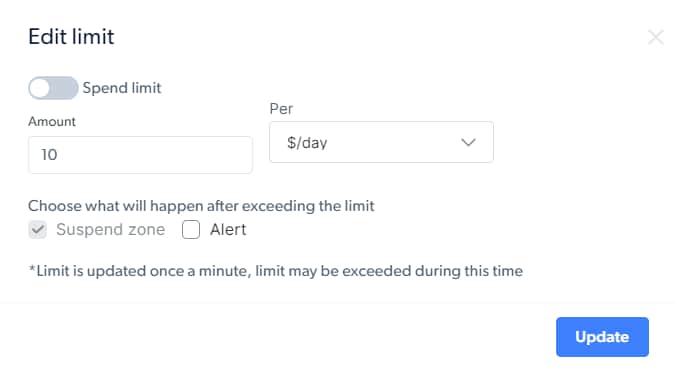
SERP API Zone 設定 * Access parameters (存取參數)分頁底下有個 Limit 欄位,可以設定請求量限制,當到達限制後要關閉還是通知你,可以避免不小心意外耗費太多額度。
可限制 API 使用,避免超額 測試與範例頁面
Bright Data 也同樣提供 SERP API 相關測試與參數介紹頁面,在開始撰寫程式前,可以先來這邊透過網頁 UI 的方式嘗試、熟悉各參數與如何使用。
* 官方介紹中有看到支援 Google、Bing、DuckDuckGo、Yandex、Yahoo、百度 和 Naver 搜尋,不過在這個頁面缺少 百度、Yahoo、Naver,經過我向官方詢問,使用方式與參數都是一樣的,所以如果需要,稍微改一下應該就能使用了。
Playground - 測試頁面
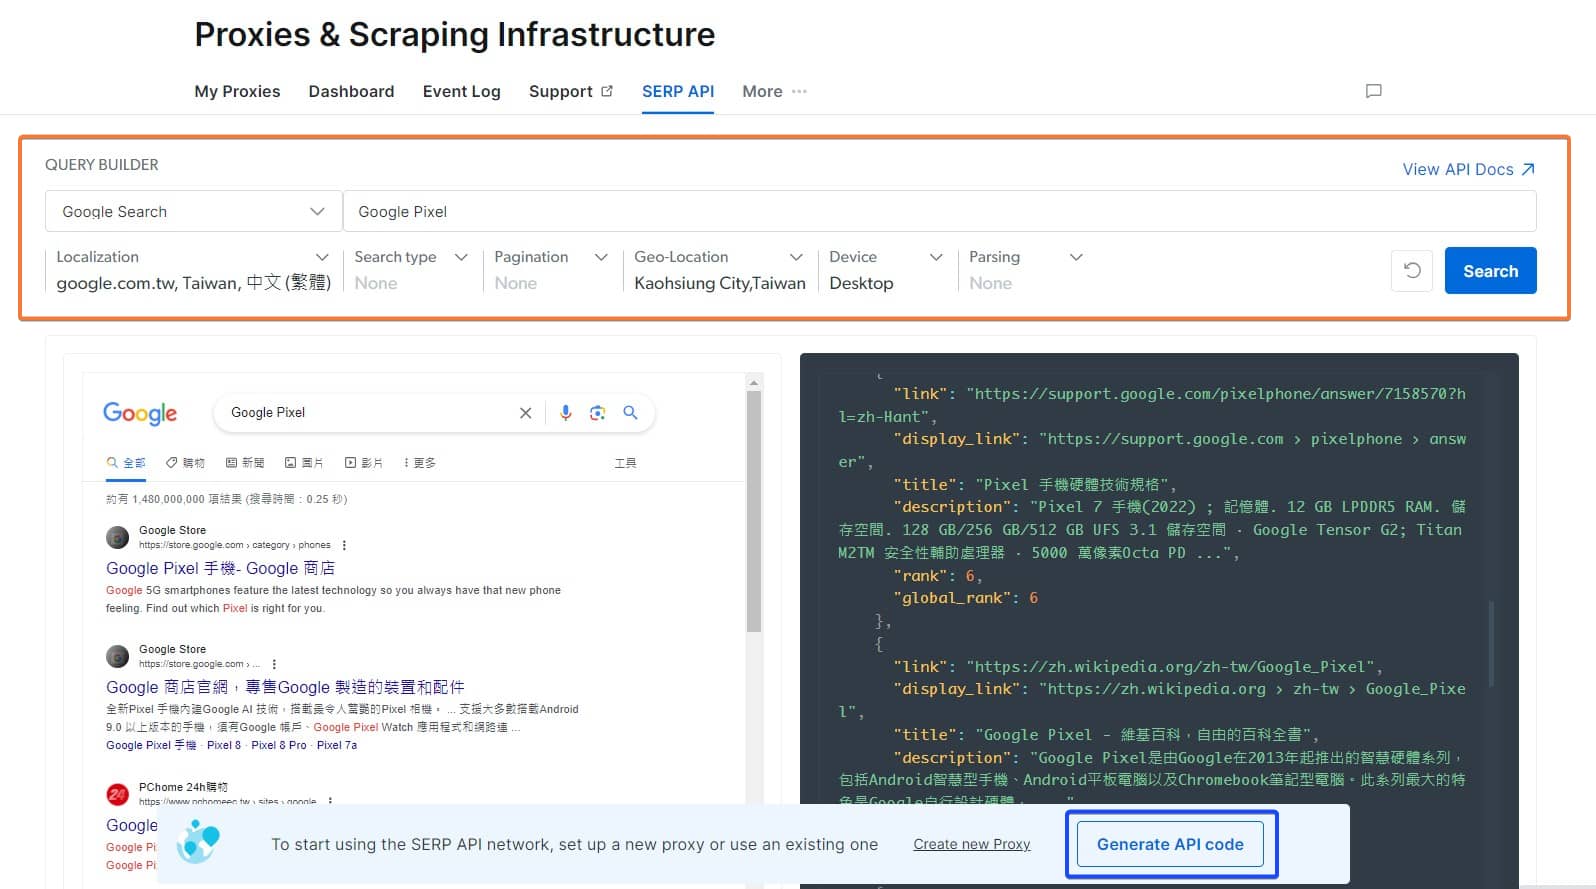
在 SERP API Playground 測試頁面,透過 UI 介面選擇瀏覽器、設定關鍵字與參數 (下圖橘框處),並實際查看它查詢後回傳的資料 (網頁與 JSON),
而且使用 Playground 是 "免費" 的!!👍
SERP API Playground 測試頁面 下方有個 "Generate API code" 按鈕 (上圖藍框處),可以查看假如依照你目前的參數設定,該如何下查詢指令(或程式碼)。
但有點可惜的是,"非同步請求" 的程式碼範例只有 Shell 跟 Node.js,而"同步請求" 雖然有 Python 範例,但不是使用我習慣的 Requests 套件,因此我花了一些時間研究與嘗試,後面章節我有將程式碼列出來供大家參考,
Generate API code 範例程式 * 如果你還沒註冊就等不及的話,可以到 SERP API 介紹網頁中的 SERP API Live Demo 先嘗試,不過就只有讓你測試 Google 搜尋就是了。
SERP API Live Demo API Guide - 參數介紹與指令
這個 API Guide 頁面是介紹 SERP API 支援那些參數,以及該如何下這些參數。對於參數不了解的話,也可以先到這邊來看看。
同樣這頁也會因為你 proxy 設定 "同步" 或 "非同步" 請求,而有所對應改變。
SERP API Guide - 參數介紹與指令 發送請求
它的 SERP API 也有分成「同步請求」、「非同步請求」兩種請求方法。
預設是使用同步請求,使用上最簡單,只需要發送一個請求即可。但對於有大量請求需求的使用者,還是建議使用非同步請求,因為它有比較好的穩定性。
如果想切換 同步/非同步 請求,則在 SERP API Zone > Configuration 的最下面,有個「Asynchronous requests」開關
SERP API 切換 同步/非同步 請求 官方範例是使用我不熟悉的套件,但我比較習慣使用 requests 套件,因此底下範例程式是我自己改寫的~✍️
同步請求
只要發送一個 GET 請求即可取得結果。
它是透過 proxy 將請求轉給他們,proxy 設定為:http://brd-customer-{ACCOUNT_ID}-zone-{ZONE}:{PASSWORD}@{HOST}http://brd-customer-oooooooo-zone-serp_api:xxxxxxxx@brd.superproxy.io:22225
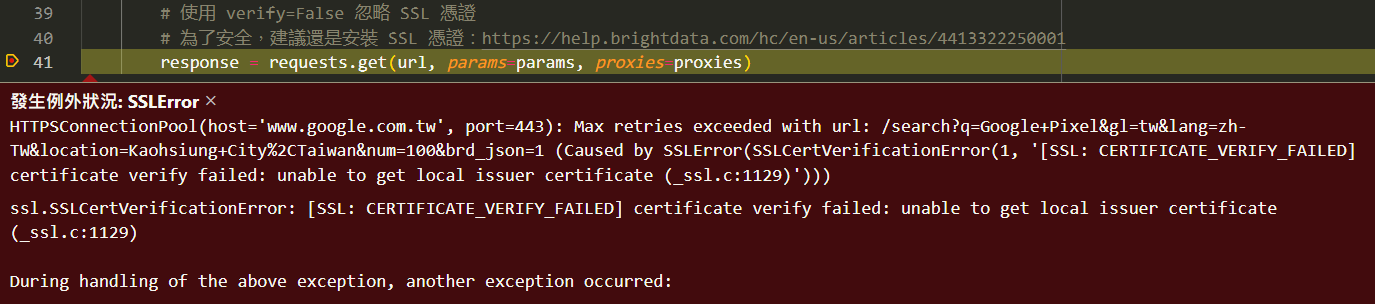
另外,出於資訊安全的考量,進行 HTTPS 連線時 Python 會檢查伺服器的 SSL 憑證是否有效,因此還需要安裝 SSL 憑證,否則會出現像下圖那樣的錯誤,可以參考官方文章:
如何安裝 SSL 憑證
遇到 SSL 憑證問題 那假如只是要測試,我們可以 “忽略憑證” (verify=False,參考 這篇文章
),如同下方範例程式馬。
參數說明可以 參考這篇
,或者如果已經登入,可以在後台的 API Guide 頁面 去查看各種查詢與參數該如何下。
Python 程式碼範例:
 1
 2
 3
 4
 5
 6
 7
 8
 9
10
11
12
13
url = 'https://www.google.com.tw/search'
params = {
"q" : "Google Gemini" , # 搜尋關鍵字
"gl" : "tw" ,
"num" : "100" ,
"brd_json" : "1" # 回傳 JSON 格式,預設是 html
}
proxy_url = f "http://brd-customer-{ACCOUNT_ID}-zone-{ZONE}:{PASSWORD}@{HOST}"
proxies = { 'http' : proxy_url , 'https' : proxy_url }
# 使用 verify=False 忽略 SSL 憑證
# 為了安全,建議還是安裝 SSL 憑證:https://help.brightdata.com/hc/en-us/articles/4413322250001
response = requests . get ( url , params = params , proxies = proxies , verify = False )
print ( response . json ())
* 各個狀 SERP API 錯誤訊息意思如
這個官方清單
。
非同步請求
在說明用法之前,我們要先去產生一組 API Token (
官方說明文章
)。
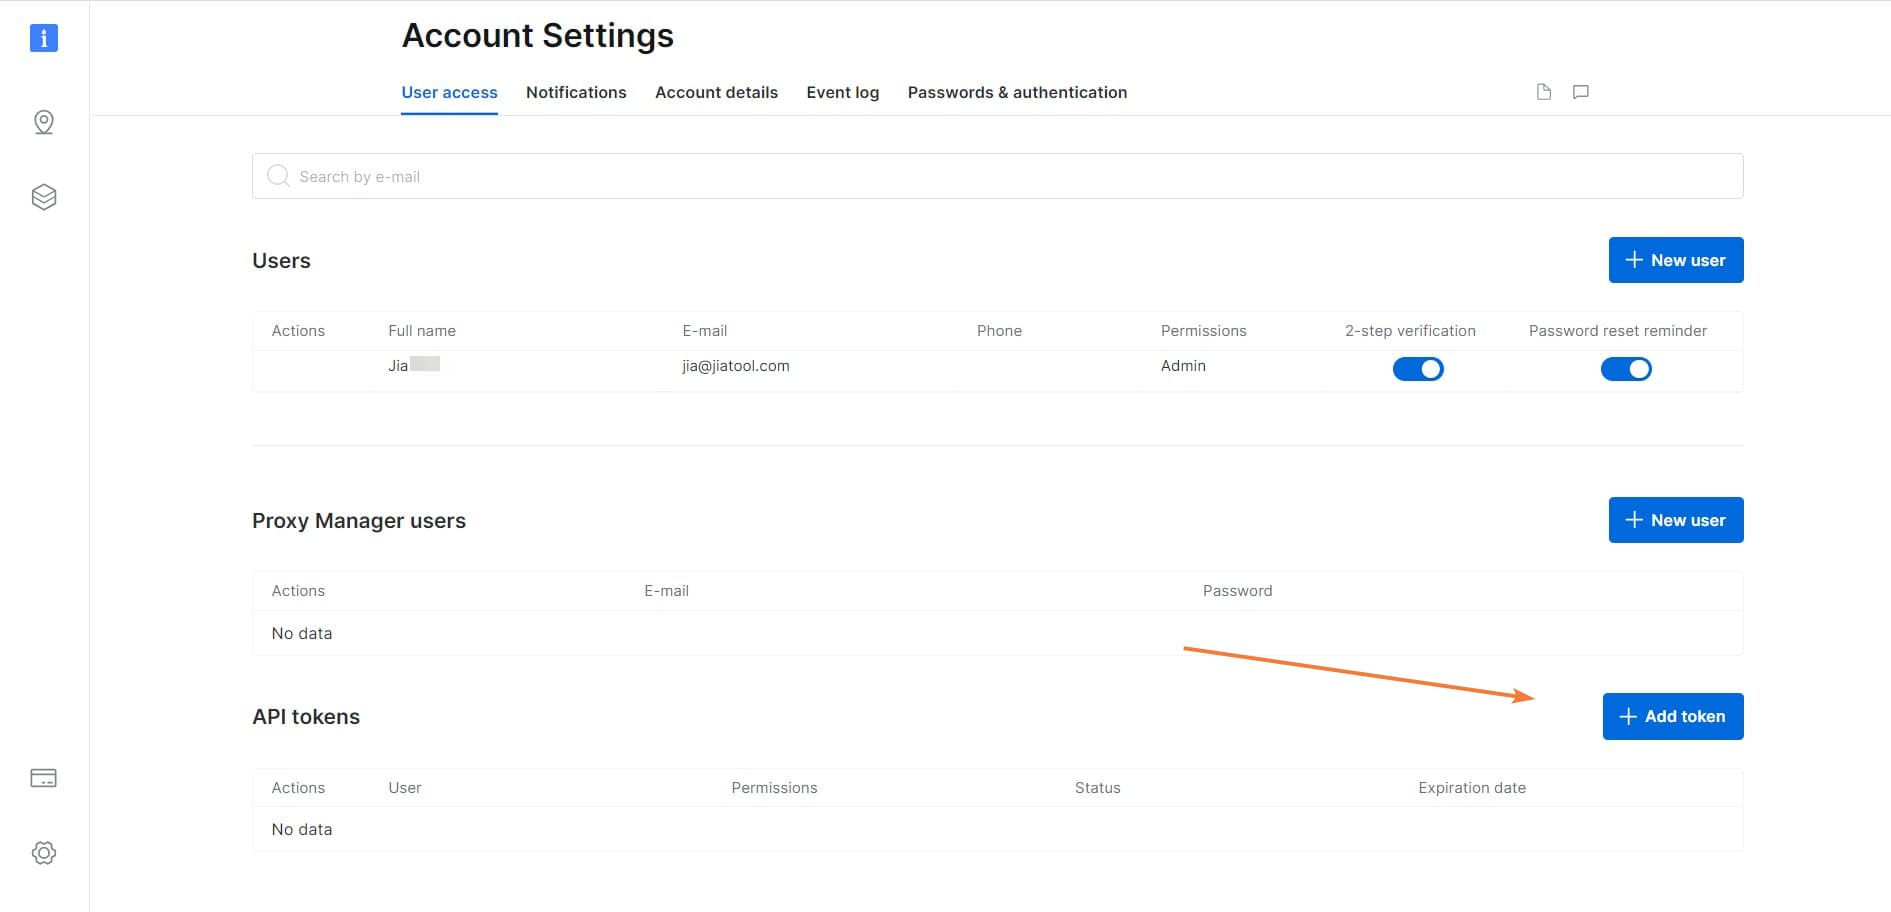
到後台的 Account Settings > User access 頁面,點擊最下方 API tokens 的右邊 "Add token" 按鈕。
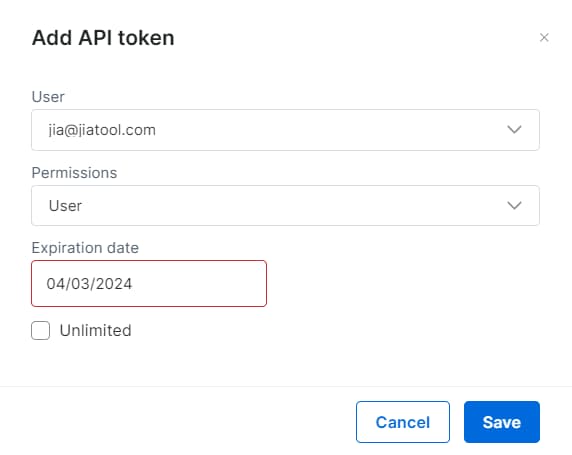
Account Setting > Add token 並指定要給哪一位 User 使用,Permission 就選擇 "User" 即可,期限可以指定日期或勾選下方的"Unlimited (無期限)"。
* 因為這關係到權限,可能會需要去信箱收驗證信。
Add API token 它產生的 API Token 要複製起來,不然之後忘記就要重新產生了。
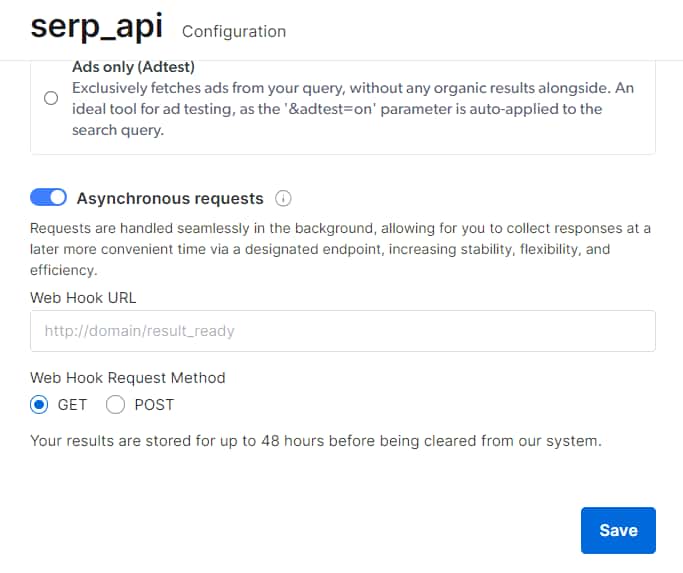
再來到你的 SERP API Zone 中 Configuration 分頁,最下方將「Asynchronous requests」開關打開。
SERP API 切換 同步/非同步 請求 這邊的 "Web Hook URL" 和 "Web Hook Request Method" 你可以設定,讓任務完成後會主動來呼叫你,或者像我下面將要說明的 — 由我們自己去取得結果,那就不需要填這兩個欄位了。
記得要 Save。
好了,終於要來講 "非同步請求" 該怎麼使用了。
它與 "同步請求" 使用方式有所不同,"非同步請求" 使用上分為兩個請求:
設定任務 取得任務的查詢結果 先使用 POST 請求「設定任務」,指定查詢參數、回傳格式。x-response-id",這個代表 Response ID,也就是下一步要使用的。
第二步,送出 GET 請求「取得任務的查詢結果」,帶上第一步取得的 x-response-id。Status Code = 200,Body 內容即是查詢結果資料;如果查詢任務還沒完成,收到 Status Code = 404 (Not Found),那就要等個幾秒再試一次。
可以直接參考下方範例程式碼,或參考 這篇官方說明
。
* 當然只有 "設定任務" 請求會收費 (如果成功的話)。
Python 程式碼範例:
 1
 2
 3
 4
 5
 6
 7
 8
 9
10
11
12
13
14
15
16
17
18
19
20
21
22
23
24
25
# 記得要先去後台開啟 Asynchronous requests
url = f 'https://api.brightdata.com/serp/req?customer={ACCOUNT_ID}&zone={ZONE}'
headers = {
'Content-Type' : 'application/json' ,
'Authorization' : f 'Bearer {API_TOKEN}'
}
data = {
"country" : "tw" ,
"query" : {
"q" : "Google Gemini" , # 搜尋關鍵字
"gl" : "tw" ,
"num" : "100"
},
"brd_json" : "json" # 回傳 JSON 格式,預設是 html
}
response = requests . post ( url , headers = headers , json = data )
response_id = response . headers . get ( "x-response-id" )
print ( f "response id: {response_id}" )
time . sleep ( 10 ) # 等待它完成查詢
url = f 'https://api.brightdata.com/serp/get_result?customer={ACCOUNT_ID}&zone={ZONE}&response_id={response_id}'
headers = { 'Authorization' : f 'Bearer {API_TOKEN}' }
response = requests . get ( url , headers = headers )
print ( response . json ())
* 各個狀 SERP API 錯誤訊息意思如
這個官方清單
。
查詢結果說明
SERP API 回傳的查詢結果我以 JSON 格式來說明,以下直接貼出範例結果給大家參考,大部分欄位應該很容易就看出來意思。
其他說明可以直接參考官方說明:
 1
 2
 3
 4
 5
 6
 7
 8
 9
10
11
12
13
14
15
16
17
18
19
20
21
22
23
24
25
26
27
28
29
30
31
32
33
34
35
36
37
38
39
40
41
42
43
44
45
46
47
48
49
50
51
52
53
54
55
56
57
58
59
60
61
62
63
64
65
66
67
{
"general" : {
"search_engine" : "google" ,
"results_cnt" : 2030000000 ,
"search_time" : 0.31 ,
"language" : "zh-TW" ,
"mobile" : false ,
"basic_view" : false ,
"search_type" : "text" ,
"page_title" : "Google Pixel - Google 搜尋" ,
"timestamp" : "2023-12-03T14:27:44.026Z"
},
"input" : {
"original_url" : "https://www.google.com.tw/search?q=Google+Pixel&gl=tw&lang=zh-TW&location=Kaohsiung+City%2CTaiwan&brd_json=1" ,
"request_id" : "xxxxxxxx"
},
"organic" : [
{
"link" : "https://store.google.com/tw/category/phones?hl=zh-TW" ,
"display_link" : "https://store.google.com › category › phones" ,
"title" : "Google Pixel 手機- Google 商店" ,
"description" : "Google 5G smartphones feature the latest technology so you always have that new phone feeling. Find out which Pixel is right for you." ,
"rank" : 1 ,
"global_rank" : 1
},
{
"link" : "https://store.google.com/tw/?hl=zh-TW" ,
"display_link" : "https://store.google.com › ..." ,
"title" : "Google 商店官網,專售Google 製造的裝置和配件" ,
"description" : "全新Pixel 手機內建Google AI 技術,搭載最令人驚艷的Pixel 相機。 ... 支援大多數搭載Android 9.0 以上版本的手機,須有Google 帳戶、Google Pixel Watch 應用程式和網路連 ..." ,
"rank" : 2 ,
"global_rank" : 2
},
......
{
"link" : "https://guidebooks.google.com/pixel?hl=zh-Hant" ,
"display_link" : "https://guidebooks.google.com › pixel" ,
"title" : "瞭解「Google Pixel」" ,
"description" : "設定新的Pixel 手機. 瞭解如何從你的舊Android 手機或iPhone® 轉移資料。 接下來,你可以學習如何自訂各項設定、取得日常事務協助以及 因應緊急狀況等等。" ,
"rank" : 10 ,
"global_rank" : 10
}
],
"pagination" : {
"current_page" : 1 ,
"next_page_link" : "https://www.google.com.tw/search?q=Google+Pixel&sca_esv=587474982&gl=tw&hl=zh-TW&ei=XZBsZxxxxxxxx4HIDg&start=10&sa=N" ,
"next_page_start" : 10 ,
"next_page" : 2
},
"related" : [
{
"list_group" : false ,
"link" : "https://www.google.com.tw/search?sca_esv=587474982&gl=tw&hl=zh-TW&q=google+pixel%E8%A9%95%E5%83%B9&sa=X&ved=2ahUKEwiS9uLuvPOCAxXYBogKHdNVAOkQ1QJ6BAgjEAE" ,
"text" : "google pixel評價" ,
"rank" : 1 ,
"global_rank" : 11
},
......
{
"list_group" : false ,
"link" : "https://www.google.com.tw/search?sca_esv=587474982&gl=tw&hl=zh-TW&q=google%E6%89%8B%E6%A9%9Fpixel+7&sa=X&ved=2ahUKEwiS9uLuvPOCAxXYBogKHdNVAOkQ1QJ6BAgeEAE" ,
"text" : "google手機pixel 7" ,
"rank" : 8 ,
"global_rank" : 18
}
]
}
完整 Python 範例
首先要確認有安裝 Requests 套件:
完整 Python 程式碼:
  1
  2
  3
  4
  5
  6
  7
  8
  9
 10
 11
 12
 13
 14
 15
 16
 17
 18
 19
 20
 21
 22
 23
 24
 25
 26
 27
 28
 29
 30
 31
 32
 33
 34
 35
 36
 37
 38
 39
 40
 41
 42
 43
 44
 45
 46
 47
 48
 49
 50
 51
 52
 53
 54
 55
 56
 57
 58
 59
 60
 61
 62
 63
 64
 65
 66
 67
 68
 69
 70
 71
 72
 73
 74
 75
 76
 77
 78
 79
 80
 81
 82
 83
 84
 85
 86
 87
 88
 89
 90
 91
 92
 93
 94
 95
 96
 97
 98
 99
100
101
102
103
104
105
106
import time
import json
import requests
ZONE = "<your_zone>"
ACCOUNT_ID = "<your_account_id>"
PASSWORD = "<your_password>"
HOST = "<your_host>"
API_TOKEN = "<your_api_token>"
class Brightdata ():
def __init__ ( self , zone , account_id , password , host , api_token ):
self . zone = zone
self . account_id = account_id
self . password = password
self . host = host
self . api_token = api_token
self . username = f "brd-customer-{self.account_id}-zone-{self.zone}"
self . proxy_url = f "http://{self.username}:{self.password}@{self.host}"
def sync_get_search_result ( self , keyword ):
""" SERP API 同步請求 - 取得搜尋結果"""
proxies = {
'http' : self . proxy_url ,
'https' : self . proxy_url
}
url = 'https://www.google.com.tw/search'
params = {
"q" : keyword , # 搜尋關鍵字
"gl" : "tw" ,
"lang" : "zh-TW" ,
"location" : "Kaohsiung City,Taiwan" ,
"num" : "100" ,
"brd_json" : "1" # 回傳 JSON 格式,預設是 html
}
# 使用 verify=False 忽略 SSL 憑證
# 為了安全,建議還是安裝 SSL 憑證:https://help.brightdata.com/hc/en-us/articles/4413322250001
response = requests . get ( url , params = params , proxies = proxies , verify = False )
if response . status_code != 200 :
print ( f "Error: {response.status_code} - {response.reason}" )
return {}
return response . json ()
def async_set_search_job ( self , keyword ):
""" SERP API 非同步請求 - 設定搜尋任務
* 記得要先去後台開啟 Asynchronous requests
"""
url = f 'https://api.brightdata.com/serp/req?customer={self.account_id}&zone={self.zone}'
headers = {
'Content-Type' : 'application/json' ,
'Authorization' : f 'Bearer {self.api_token}'
}
data = {
"country" : "tw" ,
"query" : {
"q" : keyword , # 搜尋關鍵字
"gl" : "tw" ,
"lang" : "zh-TW" ,
"location" : "Kaohsiung City,Taiwan" ,
"num" : "100"
},
"brd_json" : "json" # 回傳 JSON 格式,預設是 html
}
response = requests . post ( url , headers = headers , json = data )
response_id = ""
if response . status_code == 200 :
response_id = response . headers . get ( "x-response-id" )
print ( f "response id: {response_id}" )
else :
print ( f "Error: {response.status_code} - {response.reason}" )
return response_id
def async_get_search_result ( self , response_id ):
""" SERP API 非同步請求 - 取得搜尋結果
"""
url = f 'https://api.brightdata.com/serp/get_result?customer={self.account_id}&zone={self.zone}&response_id={response_id}'
headers = { 'Authorization' : f 'Bearer {self.api_token}' }
response = requests . get ( url , headers = headers )
if response . status_code != 200 :
print ( f "Error: {response.status_code} - {response.reason}" )
return {}
return response . json ()
if __name__ == '__main__' :
brightdata = Brightdata ( ZONE , ACCOUNT_ID , PASSWORD , HOST , API_TOKEN )
# SERP API 同步請求
result = brightdata . sync_get_search_result ( "Google Pixel" )
print ( json . dumps ( result ))
# SERP API 非同步請求
# response_id = brightdata.async_set_search_job("Google Pixel")
# time.sleep(10) # 等待它完成查詢
# result = brightdata.async_get_search_result(response_id)
# print(json.dumps(result))
* 官方還有更多的說明文件,有需要都可以進去看看:
結語
如果你有爬取(抓取)搜尋結果資料的需求,我覺得花點小錢還是蠻值得的,總比自己在那邊 搞爬蟲、驗證碼(CAPTCHA)、換 IP、Proxy、被Ban帳號 好太多了… (<- 過來人😭😭😭
Bright Data 除了這次介紹的 SERP API 工具外,他還有其他很多的服務,像是 Proxy、Scraping Browser API、Web Scraper IDE、Web Unlocker 等等,如果有這方面的需求,也可以跟他們詢問 (反正問又不用錢XD)。
參考:BrightData 官方網站 BrightData SERP-API 官方文檔1 BrightData SERP-API 官方文檔2 BrightData SERP-API 常見 Q&A BrightData 使用者後台
只做能力範圍的事,就永遠無法進步。